heritage packaging competitors
Other Packaging Topics

Heritage Packaging Competitors & Alternatives for Custom Pouches

$0.00
Cart

No products in the cart.
round account button with user insidegrey Heritage Packaging Competitors & Alternatives for Custom Pouches

Heritage Packaging Competitors &
Alternatives for Custom Pouches

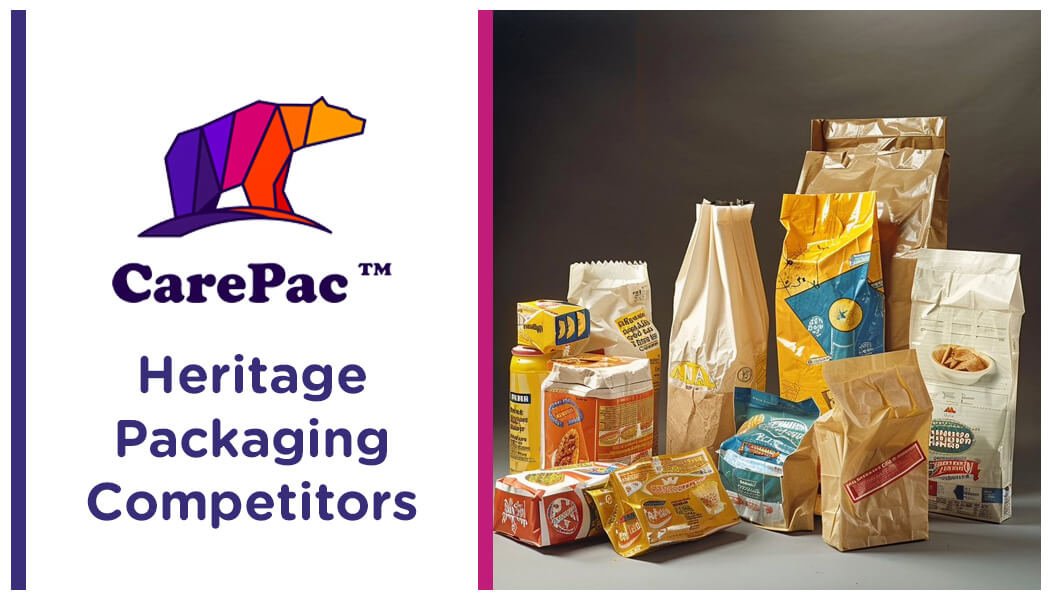
Established in 1990, Heritage Packaging provides unique sustainable packaging and protective packaging solutions that can't be bought off the shelf. Their team of packaging engineers, machine operators, and fabricators work together to create packaging solutions, including food packaging, for their clients. 


Although Heritage Packaging is one of the leading manufacturers in the packaging industry and developed a state-of-the-art packaging feature, they aren't for everyone. If you're hoping to learn more about Heritage Packaging alternatives, you've come to the right place. In this blog, we'll discuss some of Heritage Packaging's key competitors and emerging players in the flexible barrier packaging space. 

CarePac: The Preferred Vendor for Sustainable Packaging Alternatives
CarePac hertiage packaging alterntaives Heritage Packaging Competitors & Alternatives for Custom Pouches

Unlike some of the other Heritage competitors on this list, CarePac lives and breathes flexible packaging. We have 10+ years experience in the industry, and constantly seek plastic alternatives and sustainable packaging that will help reduce your carbon footprint. If you're trying to avoid single use plastic and are looking for a biodegradable alternative that produces less waste, our solutions can help. 

But, don't just take it from us. Take it from our happy customers, who said this on Google: "This company is amazing with their customer service and fast shipping. They also have a great amount of bags and pouches that your business could use. The products are durable with great quality and a professional experience. Be sure to check them out for your needs. I am positive you will be glad you did!"

Curious about our other products, our company, our business model, our services, the materials we use, cost, trends in the industry, or anything else? Browse our website to learn more or contact us today

Other Heritage Packaging Competitors

According to Semrush, an analytical tool used for digital marketing purposes, Heritage Packaging's key organic competitors include: 

Heritage Container

Heritage Container is one of the leading sustainable packaging alternatives to Heritage Packaging. They believe that retail and food packaging is part of the product, and focus on offering packaging materials made out of sustainable materials. This Heritage competitor is ideal if you're concerned about carbon emissions, greenhouse gas emissions, reducing plastic waste in the landfills, your carbon footprint, and the environmental impact using single use plastic in your packaging. 
the heritage container
The Packaging Company

The Packaging Company

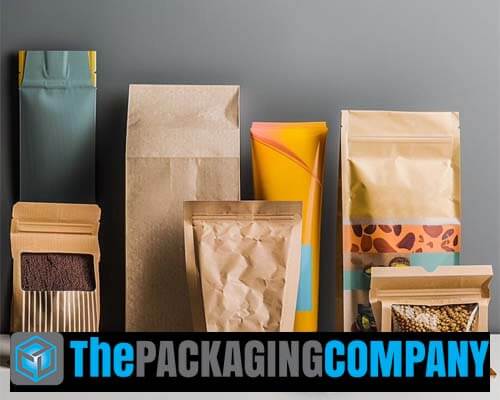
Based in New Zealand, The Packaging Company is a 100% locally owned and operated packaging supplier. They have 85 years of packaging knowledge, and are dedicated to providing the best price on their packaging, promoting product integrity, and high-quality service. Although their range of packaging products includes packaging alternatives like bubble wrap, liners, cardboard boxes, produce bags, and adhesive tapes, they focus primarily on the manufacture of custom printed polythene packaging. 

Victor Packaging

Victor Packaging is an innovative manufacturer of plastic tube packaging in South East Asia. Composed of six different packaging companies with 450 employees in Thailand, they offer a wide range of PBL tubes and PET bottles, primarily for the beauty industry. Their packaging is trusted by leading brands like L'Oreal, Nivea, and Amika, and their packaging can be used for a variety of health and beauty applications. 
Victor Packaging
ABC Packaging Direct

ABC Packaging Direct

ABC Packaging Direct is a global supplier of flexible packaging, including food packaging, pouches made from single use plastics, and styrofoam. They strive to be an end-to-end strategic packaging and sourcing partner for businesses of all sizes, and take a relationship-first approach to sourcing raw materials for their packaging. 

The Need for Custom Pouch Packaging & Packaging Materials
custom packaging solutions Heritage Packaging Competitors & Alternatives for Custom Pouches

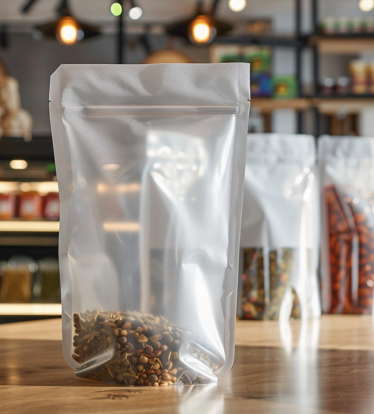
In recent years, there has been a growing demand for personalized and custom packaging solutions that also reduce plastic waste and protect renewable resources. Unfortunately, due to their sheer size and market value, Heritage Packaging and many of its key competitors simply cannot meet consumer expectations for packaging in this area. 

To put it simply, fully customizing a packaging product using plastic alternatives while maintaining product integrity isn't easy, and doing so while reducing greenhouse gas emissions and avoiding wasteful paper mills is even more difficult. 

Fortunately, packaging companies like CarePac are moving in the right direction. We can create flexible packaging that's 100% customized, allowing customers to create eco-friendly sustainable packaging that keeps its environmental impacts in view that accurately represents your brand. From the top of the bag to the bottom, we'll find solutions for branding that you won't find elsewhere in the packaging industry and do all of this while still caring for the environment. 

Emerging Trend: Sustainability and the Environment

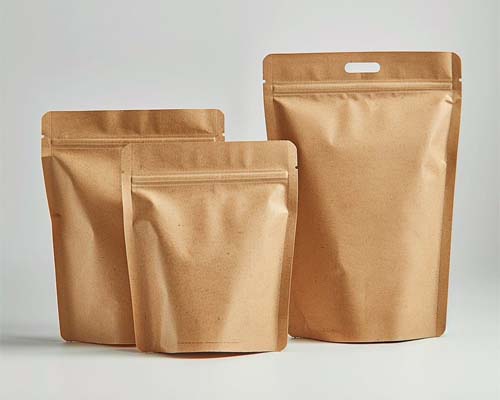
One of the biggest emerging trends in flexible packaging centers on reducing the environmental impact of packaging materials. The three branches of sustainable packaging include landfill diversion through the development of materials that are easily processed by recycling facilities. Two, biodegradable plastic bags that customers can compost with other food waste, or send to a specialized composting facility. Third, using recycled plastic in the composition of the bags (also know as PCR or post consumer recycled. 
Emerging Trend in heritage packaging Sustainability

Sales of sustainable packaging alternatives have increased each year and with the adoption of sustainability goals by large companies such as Coca Cola which plans to "[m]ake 100% of our packaging recyclable globally by 2025— and use at least 50% recycled material in our packaging by 2030."

So as the composition of the plastic that is used in bags and pouches changes, brands have to stock the biodegradable, recycled, and sustainable material that their customers are looking for. 
Lets Get Started

Made In
The USA

Full Pouch
Customization

Scalable Printing
Digital & Plate

Read More
canacon-packaging
Exhibitions and Tradeshows

Cannacon Pouch Packaging – Custom Cannabis Pouches

Carepac Logo black Cannacon Pouch Packaging - Custom Cannabis Pouches
$0.00
Cart

No products in the cart.

round account button with user insidegrey Cannacon Pouch Packaging - Custom Cannabis Pouches
Carepac Logo white Cannacon Pouch Packaging - Custom Cannabis Pouches

Cannacon Pouch Packaging
Custom Cannabis Pouches

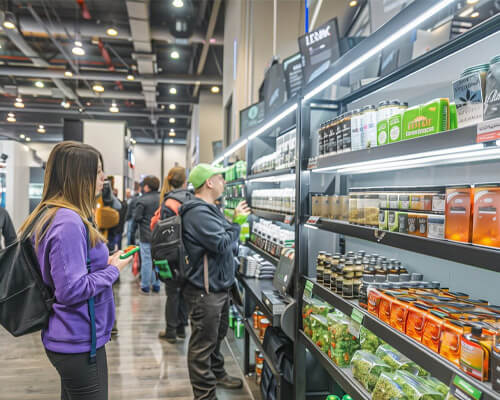
CannaCon is the premier B2B cannabis tradeshow, focusing on all aspects of the cannabiz, including cultivation, retail trends, product packaging, marketing, branding, and so much more. Each year, thousands of like-minded entrepreneurs head to CannaCon South, West, Northeast, and Midwest to create and strengthen their partnerships within the cannabis industry. This year, you can join 800+ exhibitors and 25,000+ attendees to network, learn, and have some fun! 

If you’re curious about cannabis pouch packaging specifically, you’re in luck! In 2024, CarePac will be attending CannaCon, and we’ll be available live and in person to answer any and all your questions about cannabis packaging. 

Why CarePac?

Why not CarePac? First, we’re California-based, meaning we’ve been packaging cannabis for a lot longer than a lot of the other guys. We’re well-versed in the ins and outs of cannabis packaging, including compliance requirements and the essentials like child resistance properties and making sure the bags are smell-proof and tamper-proof.  

We pride ourselves on being small and family-owned. When you contact us, you’re contacting the owners of the company directly, and we strive to make every single customer a repeat one. All our products are proudly made in the USA, and we don’t tie you to exorbitantly high order minimums. We offer prototyping as few as 100 units, meaning you can sell limited runs or special strains without having to worry about storing or keeping excess pouches. 

why-choose-carepac-for-cannacon-packaging

Types of Cannabis Packaging We Offer

Although we offer hundreds of different bag variations, we do offer specialty pouches that are catered specifically to cannabis brands. Here are a few of the packaging options we recommend for our roster of clients in the cannabis industry: 

The outer packaging that a customer leaves the dispensary with is the perfect opportunity for branding and customization. We can make custom printed child resistant packaging in a variety of styles, including shopping bag styles and standard exit bags.

Because edibles are consumed, it’s important that your packaging reflects the quality of the product inside. It’s also important that it keeps the product inside fresh. Fortunately, our edibles packaging can do both. 

Not only is custom gummy packaging a great way to make your cannabis product look as good as it tastes but, when manufactured correctly, it’ll ensure your product is compliant with laws and regulations and will make sure the cannabis and CBD gummies inside stay as fresh and as potent as they were the day they were made.

We understand that the cannabis flower is sensitive to the environment so we work hard to maintain your high standards by utilizing high quality, sustainable, materials to ensure that your marijuana, CBD, hemp, and other cannabis flower products stays fresh in the bag. Shop our selection today!

customization-options-for-cannacon-packaging

Other Customization Options

Let’s face it -- the cannabis industry is highly regulated, as it should be. As such, there are certain regulations and restrictions cannabis companies need to meet with their packaging. Fortunately, CarePac can customize your bag to include the following: 

Child-resistant properties

Smell-proof properties

Tamper-proof properties

Custom printing/finishes

Catch Us @ CannaCon

Want to hold and inspect our high-quality cannabis bags in person? Have questions about our customization process? Want to learn more about how our bags can help you meet certain regulations in your state? You can catch us at 2024 CannaCon, even if it’s just to say “hi!”

City

Date

Albuquerque

May 17, 2024 (10AM - 5PM)


May 18, 2024 (10AM - 5PM)

OKC

April 5, 2024 (10AM - 5PM)


April 6, 2024 (10AM - 5PM)

Rochester

June 20, 2024 (10AM - 5PM)


June 21, 2024 (10AM - 5PM)

ST. Paul

August 16, 2024 (10AM - 5PM)


August 17, 2024 (10AM - 5PM)

Cleveland

October 3, 2024 (10AM - 5PM)


October 4, 2024 (10AM - 5PM)

OKC

Booth: . . . . . . . . . . . . . . . . . . . . . 


April 5, 2024 (10AM - 5PM)
April 6, 2024 (10AM - 5PM)


Location: OKC Convention Center 100 Mick Cornett Drive, OKC 73109

Albuquerque

Booth: . . . . . . . . . . . . . . . . . . . . . 


May 17, 2024 (10AM - 5PM)
May 18, 2024 (10AM - 5PM)


Location: Albuquerque Convention Center 401 2nd St NW, Albuquerque

Rochester

Booth: . . . . . . . . . . . . . . . . . . . . . 


June 20, 2024 (10AM - 5PM)
June 21, 2024 (10AM - 5PM)


Location: Joseph A. Floreano Rochester Riverside Convention Center, 123 E Main St, Rochester, NY 14604

ST. Paul

Booth: . . . . . . . . . . . . . . . . . . . . . 


August 16, 2024 (10AM - 5PM)
August 17, 2024 (10AM - 5PM)


Location: Saint Paul River Center, 175 Kellogg Blvd, St. Paul, MN 55102

Cleveland

Booth: . . . . . . . . . . . . . . . . . . . . . 


October 3, 2024 (10AM - 5PM)
October 4, 2024 (10AM - 5PM)


Location: Huntington Convention Center, 300 Lakeside Avenue, Cleveland, OH 44113

Cannabis Packaging FAQs

Can you provide examples of other cannabis brands or similar products that have successfully used your flexible barrier pouches for compliance and branding purposes?

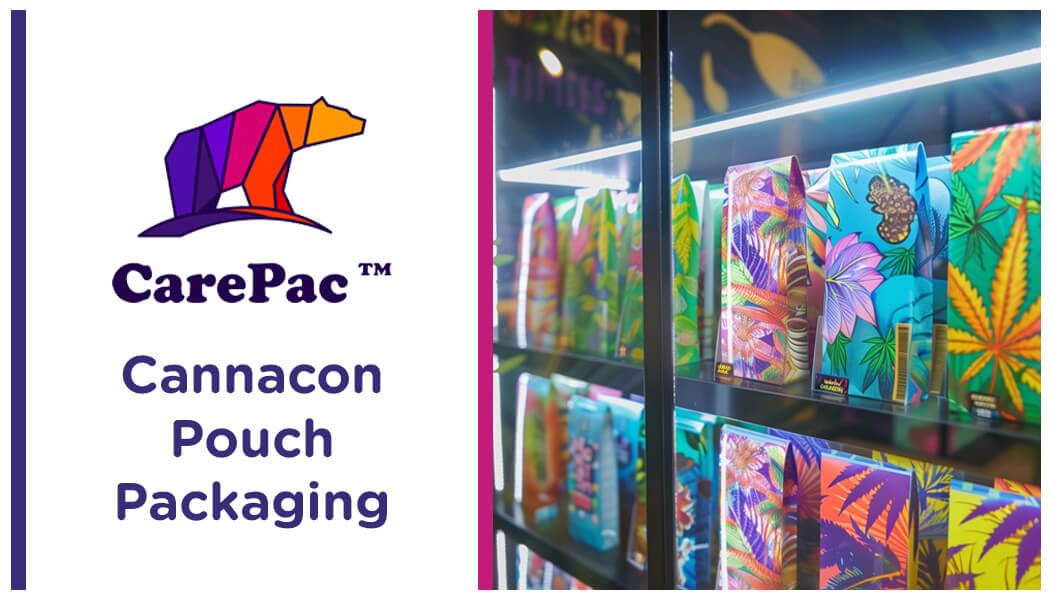
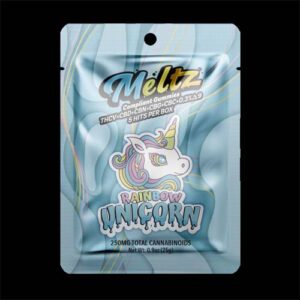
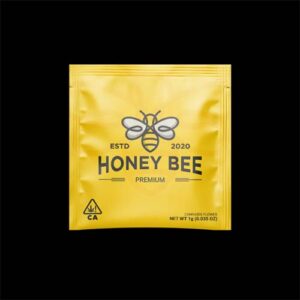
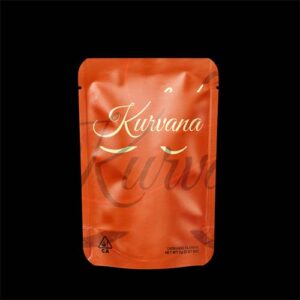
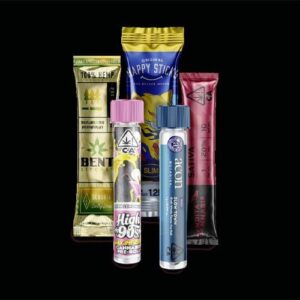
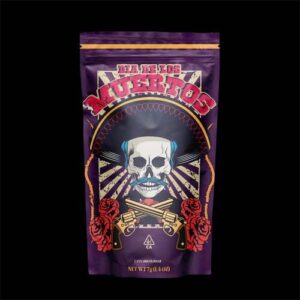
Yes, we will have examples available at CannaCon, and here are a few visual examples as well.

Can you provide information on the sustainability of your packaging materials and your commitment to environmentally friendly options?

We currently offer several compostable and recyclable materials. While these are great options, they do have less of a barrier. As such, we recommend using these materials for limited edition strains or smaller-batch products. 

What is the production lead time for your flexible barrier pouches?

CarePac offers a unique lead-time menu. Unlike some of our competitors, we offer total customization, from the size and material to the features included in your bag. As such, we have to plan our production more carefully than the companies that fit everyone into a few set sizes and use only one print method. Our fastest production lead time is 3 weeks.

Are your flexible barrier pouches suitable for different cannabis product formats, such as flower, edibles, concentrates, and pre-rolls?

Yes, we can create flexible barrier pouches for a variety of cannabis products, including edibles, flower, concentrates, pre-rolls, gummies, and beverages.


What innovations or special features do your pouches offer that could enhance the overall security and consumer experience of cannabis products?

One special feature that we can include on cannabis pouches that can help enhance security is holographic elements or QR codes. 

Lets Get Started

Made In
The USA

Full Pouch
Customization

Scalable Printing
Digital & Plate

Read More
how-to-find-pms-code
Packaging Design

How to Find the PMS Code/Color – Step by Step Tutorial

Carepac Logo black How to Find the PMS Code/Color - Step by Step Tutorial
$0.00
Cart

No products in the cart.

round account button with user insidegrey How to Find the PMS Code/Color - Step by Step Tutorial
Carepac Logo white How to Find the PMS Code/Color - Step by Step Tutorial

How to Find the PMS Code/Color
Step-by-Step Tutorial

Everyone knows Tiffany blue means diamonds, and McDonald's yellow means French fries. These brand colors are synonymous with the company's name and what they sell, which is no easy feat. If colors matter to a brand, making sure the colors are accurate when printing marketing and branding materials matters more. But, if you're reading this blog about Pantone color, we don't have to tell you this! 


In this blog, we'll walk you through how to easily find your Pantone color in Adobe Illustrator so you can effortlessly perfect and print your color choices for stunning designs on paper, plastic, or other materials. But first, we'll walk you through the background and basics of colors in Adobe Illustrator. 

Understanding Pantone Color

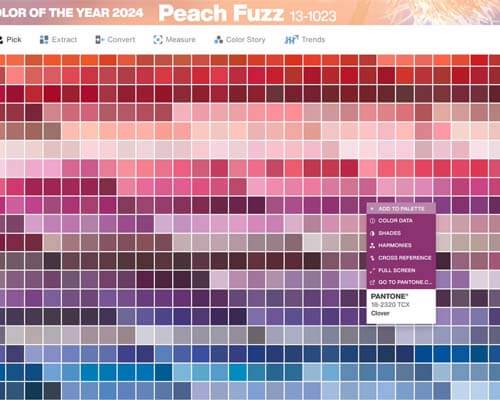
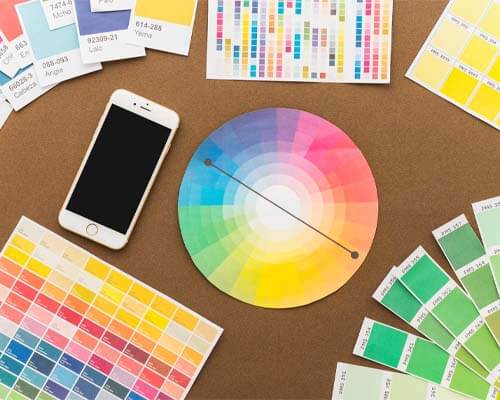
PMS is an acronym for "Pantone Matching System". As such, PMS colors are Pantone colors that can be specified for commercial printers. Pantone colors are custom-mixed ink colors that you can request for something like your logo, company name, or other branding asset. 

Just like a homeowner might select a Pantone color for their walls or custom couch, you can choose Pantone color group for your marketing materials using Pantone colors in Illustrator. 

Why? Well, accurate color representation matters in design almost more than the logo or "about the company" section on a package or pouch. Your customers see Pantone color before they see branding, and by using the Pantone color system to find the appropriate Pantone color number you can be sure you're using the right Pantone color. 

Understanding Pantone color
Pantone Connect

Pantone Connect

Pantone Connect is a new service from Pantone which combines a website app and an Adobe plugin to work with Pantone colors. 


If you are willing to pay the monthly fee for Pantone Connect, you can download and install the Pantone Connect plugin and access up to date colors using that plugin. 

Using Adobe Illustrator's color tools

Within the latest version of Adobe Illustrator, there are a variety of Pantone color tools that designers can use to choose colors and use them to create marketing materials. From swatches panel to the eyedropper tool, it can quickly get confusing! Here are just a few of the color tools you'll find within Adobe Illustrator, not all of which are directly related to Pantone colors:

Eyedropper Tool

By using the eyedropper tool in Adobe Illustrator menu, you can sample colors from anywhere in an image and add them to your swatches panel. This way, you can easily apply the sampled color to another object on the Illustrator canvas. 

Eyedropper-tool
Swatches panel

Swatches Panel

Also called the color panel, the swatches panel is where colors, tints, gradients, and patterns are stored. You can color mix and edit, or check if the color is safe for print in the swatches panel. 

Color Guide Panel

The Color Guide Panel generates a set of color swatches that go well with a base color that you define, also referred to as an "open swatch library". Think of the color guide panel as a color inspiration tool that you can use while you create or recolor artwork.

Color guide panel
Color Picker Dialogue Box

Color Picker Dialog Box 

This is where you fine-tune your choice of colors in Adobe. Here you can create a custom color by entering color values, or by choosing from a library of colors, or a swatch library. 

Now that you know more about the different Pantone color tools within the menu of Adobe Illustrator, we'll walk you through how to use the Pantone system color library using Illustrator. 

How to find PMS color in Illustrator

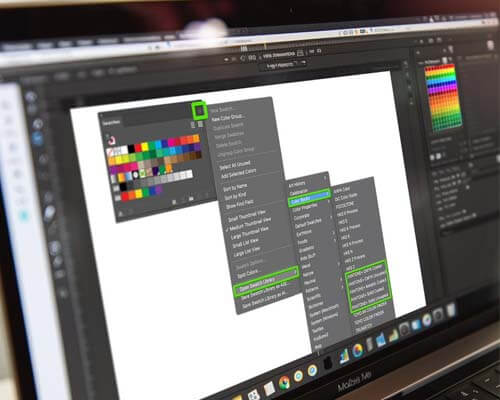
If you're using Adobe Illustrator, it's easy to find the PMS color of your logo. Just follow these steps, and you can easily apply the PMS color to other marketing materials. Here's how to find Pantone colors in Adobe programs:


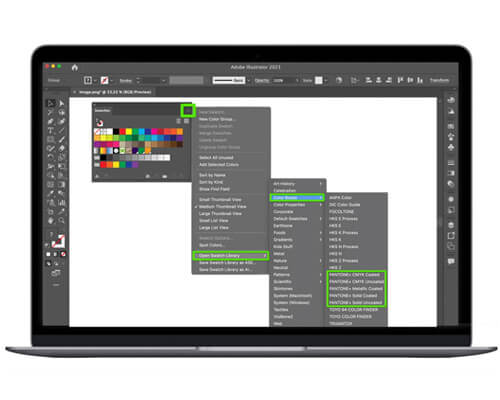
  • Open the file and click on your logo using the "Direct Selection" tool in the drop down menu.
  • On the right side of the window, click on "Colors Panel".
  • After you find Pantone color or hue, it will be displayed on the overhead menu of the window. 

You can then use the search bar or pop up menu to recolor artwork or incorporate the Pantone panel of colors into your marketing materials using the recolor artwork tool. Just be sure to use the 'Save File' option so you can pick up your printed project at a different time in the future.

An important note about Pantone colors in Adobe Illustrator

Told you it's easy! One important thing to keep in mind: this tool will not show you the exact color of your logo, rather it'll show you the PMS color that most closely matches the color you're currently using in your logo. You can find the same colors in the preferred color mode your printer uses, whether that's the CMYK system or RGB. 


This is a great tool to use in Adobe Illustrator if you're looking for the closest PMS match, or if you're in the process of re-branding and want to switch your logo color to one that's part of the Pantone swatch panel or Pantone palette. 

important note about Pantone colors in Adobe Illustrator

Applying Pantone Colors to Your Design

So, now that you know what your Pantone color is, how should you apply Pantone swatches to your marketing materials? Well, that's purely up to you! Here are a few ideas on how to apply Pantone colors to your artwork: 


  • Incorporate your Pantone color into your logo image, or use it in lieu of a logo on your artwork or packaging.
  • Remember that certain CMYK, RGB, or Pantone colors mean certain things to customers. For example, green is often used for natural or healthy foods, while yellow is typically used for serotonin-inducing products.
  • Use colors to draw attention to the most important parts of your packaging.
  • Just remember: once you've confirmed your Pantone palette, make sure every member of your design team knows how to access the Pantone colors in Illustrator. This way, they can use the palette on your brand's artwork and printed materials.

Pantone Colors & Adobe Illustrator FAQs:

Here are some common questions we've received from customers about finding and using Pantone colors in Illustrator, whether it's being used on an image, a swatches panel, or in Pantone color books.


Can I use Pantone colors in all types of design projects?

Yes. The goal of using Pantone colors in graphic design is that it ensures consistent colors across all platforms. This way, your audience has the same impression of your brand, regardless of the specific asset, package, or marketing material they're looking at. 

Are there differences between PMS colors in print and digital design?

Yes, there are. One important thing to remember as you navigate Pantone colors in Illustrator is that digital printing devices can't reproduce Pantone colors; you'll have to first convert them to CMYK color mode.

How do I ensure accurate Pantone color reproduction across different printing methods?

The best way to ensure accurate PMS color reproduction across different printing methods is to convert them to the appropriate color group. This will be either CMYK or RGB codes. If your printer uses and prefers Pantone (PMS), you won't need to make any conversions. But if they prefer CMYK or RGB, you'll need to take the time to convert them to CMYK or RGB. 

CarePac: Your Partners in Packaging Design

At CarePac, we have decades of experience with packaging design and Illustrator. In fact, it's all we do! 

Our helpful CareDesign team is well versed in using the Pantone matching system to correlate your brand's colors to the colors in the Pantone palettes, and we're more than happy to help guide you through the matching system process. 

Whether you have a graphic design team or it's just you, we can help you create the packaging of your dreams. Connect with us today to discuss your project, or get an Instant Quote using our convenient online platform. 

Let's Get Started

Made In
The USA

Full Pouch
Customization

Scalable Printing
Digital & Plate

Read More
specialty-coffee-expo
Exhibitions and Tradeshows

Specialty Coffee Expo Trusted Pouch Provider-  CarePac

Carepac Logo black Specialty Coffee Expo Trusted Pouch Provider-  CarePac
$0.00
Cart

No products in the cart.

round account button with user insidegrey Specialty Coffee Expo Trusted Pouch Provider-  CarePac
Carepac Logo white Specialty Coffee Expo Trusted Pouch Provider-  CarePac

Specialty Coffee Expo 
Trusted Pouch Provider -  CarePac

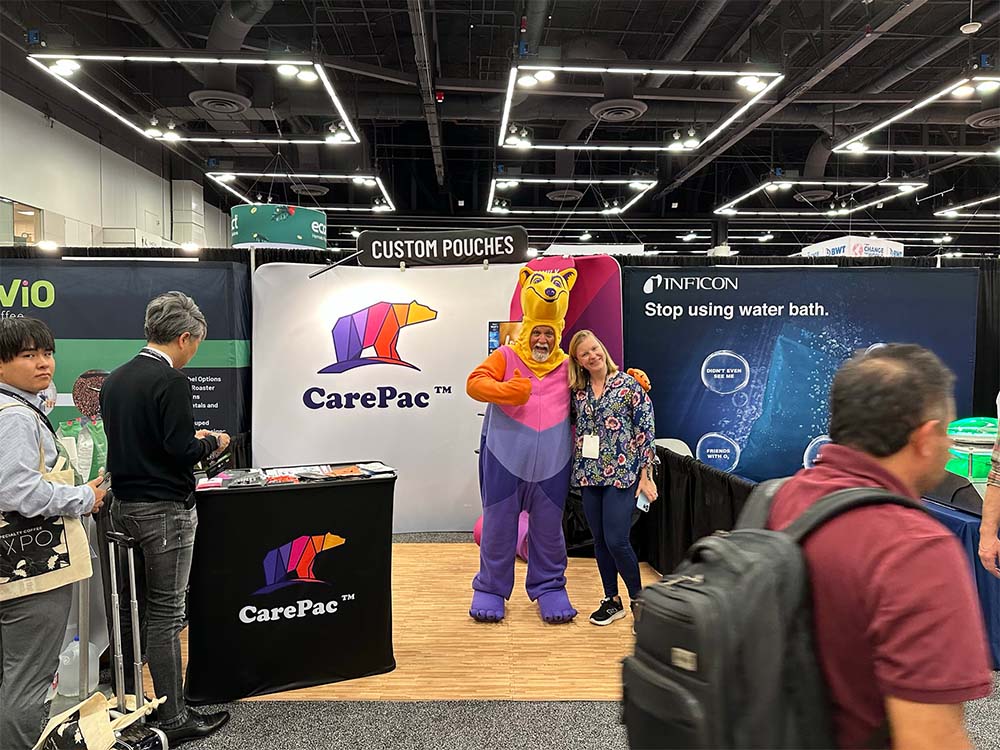
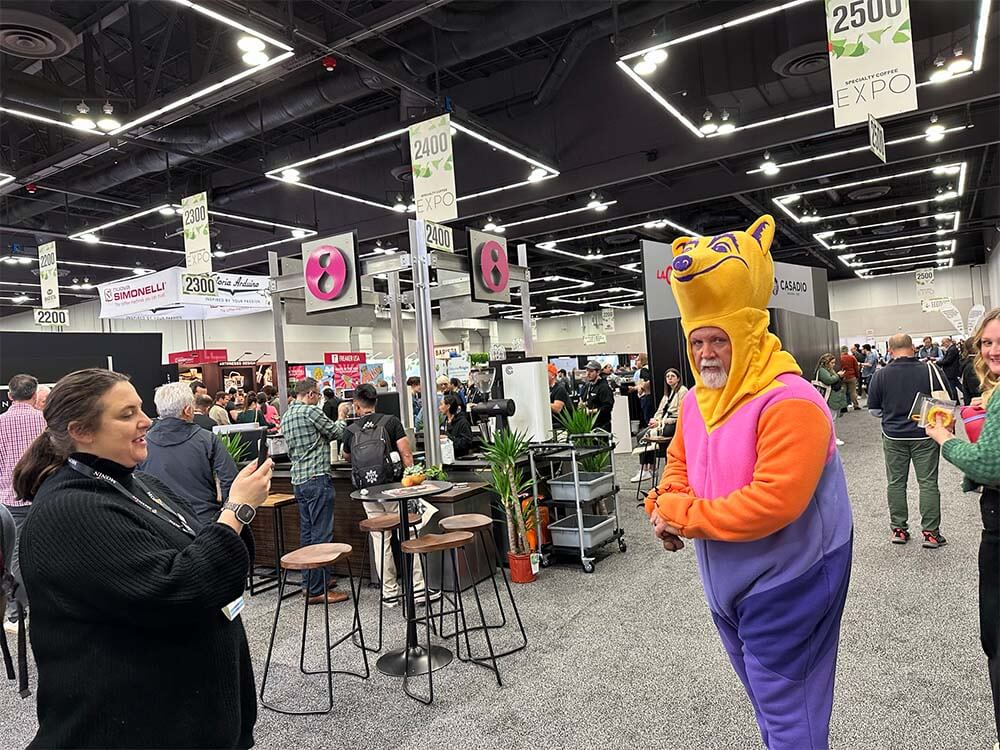
Speciality Coffee Expo (SCE) is the largest tradeshow that’s focused exclusively on America’s favorite beverage -- coffee! As a coffee packaging provider, our favorite part of the event is the coffee design awards for branding and packaging, but we might be a little biased. 😉

If you have your eyes on that prize, connect with us at the event to discuss your coffee packaging needs. Unlike other coffee packaging providers, we allow for full customization, from the bag size and material to branding. We work with coffee companies of all sizes to help them craft an aesthetically pleasing bag that’ll keep their beans as fresh as the day they were roasted.

Why CarePac?

Because we’re awesome. In all seriousness, though, we pride ourselves on being a small, family-owned and operated business that takes packaging as seriously as you take coffee. We live and breathe packaging, and all our products are proudly made in the USA. We strive to make every customer a repeat customer, and you’ll notice this as our helpful CareDesign team guides you through the process.

And when we say we work with companies of all sizes, we mean it. In fact, we offer prototyping as few as 100 units! This allows coffee brands, like yours, to test new blends or offer seasonal flavors without having to invest your entire packaging budget into a single style of bag.

Why CarePac_expo

Types of Coffee Pouches We Offer

Although we offer hundreds of different bag variations, we do offer specialty pouches that are catered specifically to coffee brands. Here are a few of the packaging options we recommend for our roster of clients in the coffee industry: 

These bags have a square bottom, stand up on their own, and can be fully customized to represent your brand.

Although this is an older pouch configuration, it’s extremely popular in the coffee industry for its versatility.

These are four-corner bags that have two premade side gussets that provide reinforcement so your product stands tall on shelves. 

Other-Customization-Options

Other Customization Options

Let’s face it - the coffee industry is saturated with competition, and standing out often comes down to packaging. We offer a variety of customization options that can help take your packaging to the next level, including a variety of bag materials and finish options. Here are a few options to consider:

For the eco-conscious consumer who prefers to buy coffee in bulk, the zipper helps keep things fresh while the environmentally friendly material allows them to compost their bag when they’re done with it. 

Whether your target market is the commercial food industry or doomsday preppers, our line of vacuum seal bags will keep your coffee fresh for as long as possible. Bonus: opt for lay flat pouches for easy storage.

High-quality finishes like soft touch or metallic effects can encourage customers to pick up your product while browsing the crowded aisles at the grocery store. 

Catch Us @ Specialty Coffee Expo

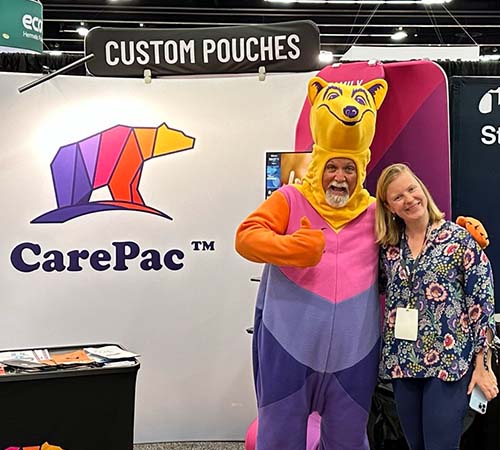
Want to hold and inspect our high-quality bags in person? Have questions about our customization process? Just want to say “hi”? You can catch us at the 2024 Specialty Coffee Expo!

Coffee Pouch & Packaging FAQs  

Can you provide examples of custom pouch designs you’ve created for other brands?

Yes, we will have examples available at the SCE, and here are a few visual examples as well.

What materials do you recommend for preserving coffee freshness, and can you customize them for our specific needs?

Our CareSilver and CareFoil materials are our highest barrier materials, meaning they’ll really keep your coffee fresh. 

What is the typical lead time for designing and manufacturing custom coffee pouches?

CarePac offers a unique lead-time menu. Unlike some of our competitors (Roastar and ePac, to name two!), we offer total customization, from the size and material to the features included in your bag. As such, we have to plan our production more carefully than the companies that fit everyone into a few set sizes and use only one print method. Our fastest production lead time is 3 weeks.

Do you offer environmentally friendly packaging options, and are they suitable for coffee products?

Yes, we currently offer compostable and recyclable materials. While these are great options, they do have less of a barrier. As such, we recommend using these materials for small or seasonal batches.  

Can you accommodate various sizes and shapes to match our coffee product range?

Yep! When we say “total customization”, we mean it. Unlike other companies that force you to fit your product into their bags, we create bags specifically for your product. 

What printing and finishing options are available for customizing the appearance of our pouches?

Because we offer both plate and digital printing, we offer SO MANY finishing options, including glossy and matte. To learn more about our finishing options, check out our full range of options.

Do you have quality control measures in place to ensure consistent and durable pouches?

Yes. CarePac is ISO 9001:2015 certified, and we pride ourselves on adhering to these top management standards. 

Are there minimum order quantities or volume discounts for custom pouch orders?

CarePac offers prototyping from 100 bags, meaning you aren’t tied to printing bags in extremely high numbers. (

Will CarePac be attending Specialty Coffee Expo? If so, what booth?

...

Are your bags manufactured in the US?  

Yes, we’re extremely proud to be making pouches in the USA!

Lets Get Started

Made In
The USA

Full Pouch
Customization

Scalable Printing
Digital & Plate

Read More
understanding-color-reproduction
Packaging Design

Understanding Color Reproduction on Flexible Materials

Carepac Logo black Understanding Color Reproduction on Flexible Materials
$0.00
Cart

No products in the cart.

round account button with user insidegrey Understanding Color Reproduction on Flexible Materials
Carepac Logo white Understanding Color Reproduction on Flexible Materials

Understanding Color Reproduction
on Flexible Materials

Ink dynamics is the study of how a wider range of inks behave and interact with certain materials. It's an important consideration and essential tool for an infinite number of graphic designers and color reproduction/color management professionals around the world.  Since it directly impacts the quality of the final product, ensuring color accuracy and color temperature on the final product (after it has been printed) is essential.

Simply put, the visible spectrum of colors looks totally different in a digital image or color photography, on digital cameras, or on computer monitors than it does in real life, as things like reflected light, blue light, light sources (natural vs. fluorescent light) and exposure time can all impact how something looks. Spectral sensitivity and spectral power distribution can also impact the color balance in graphic arts. 

As such, the study of color reproduction, color temperature, and color rendering is an essential aspect of quality control. This is usually referred to, generally, as color management. 

The basics of ink dynamics

When it comes to ink dynamics and understanding its impact on color reproduction, there are a few different things to consider, including ink properties, interaction with flexible materials, and external and environmental factors that can influence ink behavior. We'll discuss each of these, and its impact on color perception and color rendition, below.

Ink properties

Ink is more than just ink: it's made up of pigments, resins, additives, and solvents. Each of these plays a critical role in determining how an ink dries on different materials and how it will display an entire range of color once dried. 

It's important to note that the human eye sees things different in real life than it does on different devices, like like a computer monitor, so understanding how to make an easy adjustment to account for this is key. 

Ink Properties in color reproduction
Interaction with flexible materials for color reproduction

Interaction with flexible materials

Different kinds of materials interact with inks different. For example, the color appearance of RGB values will look different on plastics as they do on foils
Additionally, extraneous factors, like porosity and chemical composition of the material will also impact its final color appearance. 

Factors influencing ink behavior

Finally, it's important to understand how different environmental factors (temperature, humidity, printing environment) can impact color perception. 

Color gamut mapping should take all of these into consideration, as red, green, and blue can all be impacted by a variety of environmental factors. 

Factors influencing ink behavior

An exploration of different printing methods  

There are a few different kinds of printing methods, each of which has a direct impact on color printing and color reproduction. Here's a quick breakdown of some common standard methods of printing, along with some advantages and limitations in terms of color reproduction. 

Digital printing

This type of printing uses a digital system and is best suited for customized or personalized products, and limited edition runs where cost and time are critical factors. Benefits include flexibility, speed (minimal set up time means you'll receive your packaging faster), and it's cost-effectiveness. 

Limitations include color matching (exact PMS color matching is better with the other two options on this list), and material limitations. Unfortunately, digital printing is difficult with very thick materials. 

Digital-printing-in-color-reproduction
Rotogravure & flexographic

Ideal for large-scale production runs where quality is the focus. These printing methods are typically used for products that require consistent branding and color accuracy over time and across batches, like the Tiffany Blue and McDonald's Red examples above. In these instances, the specific color must look the same across every type of marketing material or advertisement. 

This type of printing also results in ink layers that are thicker and more durable, extreme color consistency across RGB values, and exceptional print quality. The limitations are higher initial costs and less flexibility. 

Choosing the right printing method

In addition to light sources, color temperature, and how the RGB model or CMYK model looks when using different printing methods, here are some other things to consider: 

Run length

Here, you'll need to think about quantity. If you need a small supply of bags, digital is where it's at. Flexography is good for medium to large-sized runs, and rotogravure for extremely large runs where quality absolutely cannot be compromised. 

Run Length in color production
Cost in color reproduction

Cost

Upfront and ongoing costs should be considered. Choosing digital minimized upfront costs, while rotogravure is expensive initially but is more cost-effective at scale. Flexography is the middle ground. 

Quality requirements

What level of detail does your packaging need? How consistent does it need to be? While digital is the most cost-effective option, it is also less consistent.

Quality of colors in printing production
Time To MArket

Time to market

Do you need your packaging right away or can you afford to wait a bit? Digital printing allows for rapid prototyping, while rotogravure can take awhile to produce. 

Solid pigment inks: An exploration

Solid pigment inks are a type of ink characterized by their use of solid particles of pigment suspended in a binder. They are a popular choice for projects where color vibrancy and durability are important (such as in flexible packaging). Learn more about the advantages of using PMS colors with solid pigment inks. 

Advantages of using PMS colors with solid pigment inks

When discussing color reproduction, there are some benefits to using PMS colors. First, it's a standardized color palette, so your primary colors will look the same across different batches and printing methods. Second, solid pigment inks are incredibly vibrant and precise. 

If your brand has a distinct color vision and requires its colors to look the same across the color gamut, regardless of material, using PMS colors and solid pigment inks can help. 

Advantages Of PMS Colors
Challenges and things to consider

Challenges and things to consider

As with anything, there are some unique challenges and restrictions to keep in mind with PMS colors. First, they can increase the cost of printing especially for small runs. Next, PMS colors are not compatible with all materials. 

One additional consideration to keep in mind: some packaging providers offer eco-friendly inks that offer the same benefits of solid pigments while minimizing environmental impact. 

CarePac: Pushing the boundaries in flexible packaging

Can embossing and debossing be combined into a single design?

Yes! Debossing, embossing, or any combination of the two can be incorporated into your final print pieces. If you're hoping to save money, though, we recommend choosing one or the other. Since each process uses different settings of die presses, including both techniques into one package can quickly increase the price of your design. 

Is embossing and debossing suitable for all types of printing?

No -- ideally, embossing and debossing are reserved for paper and cardstock, and ideally the thicker the material the better. This printing technique should be avoided on thinner materials. 

How does embossing and debossing affect printing costs?

Of the two, debossing is the cheaper option because it only requires one plate rather than two. If you want your final print piece to have both embossed and debossed designs, this will be even more expensive than just opting for one. Additionally, if you choose to incorporate foil stamping into your final print piece, this will also impact the price. 

CarePac: Pushing the boundaries in flexible packaging

If color reproduction and color management across the material and color gamut sounds complicated, that's because it is. Fortunately, we're the experts and we're ready to help. 

Contact us today to discuss how we can leverage our expertise in ink dynamics and color reproduction to take your packaging to the next level. Together, we can create packaging that not only protects your product but exemplifies your brand. 

Lets Get Started

Made In
The USA

Full Pouch
Customization

Scalable Printing
Digital & Plate

Read More
embossing-vs-debossing-Featured
Packaging Design

Embossing vs. Debossing – Textured Printing

Carepac Logo black Embossing vs. Debossing - Textured Printing
$0.00
Cart

No products in the cart.

round account button with user insidegrey Embossing vs. Debossing - Textured Printing
Carepac Logo white Embossing vs. Debossing - Textured Printing

Embossing vs. Debossing: 
Unveiling the Art of Textured Printing

Embossing and debossing are each a printing technique, like silk screening, photo etching, or laser engraving. If you're looking to customize packaging or cards with your company logo or text, you've probably come across articles that explain the embossing process and the debossing process during your research. So, which is better? Do embossed graphics look better than those made with debossing techniques?

In this blog, we'll discussing embossing vs debossing so you can choose which tactile effect out of the two techniques is right for you. Regardless of which you choose, the finished print piece will be sure to enhance your brand recognition.

What is the embossing process?

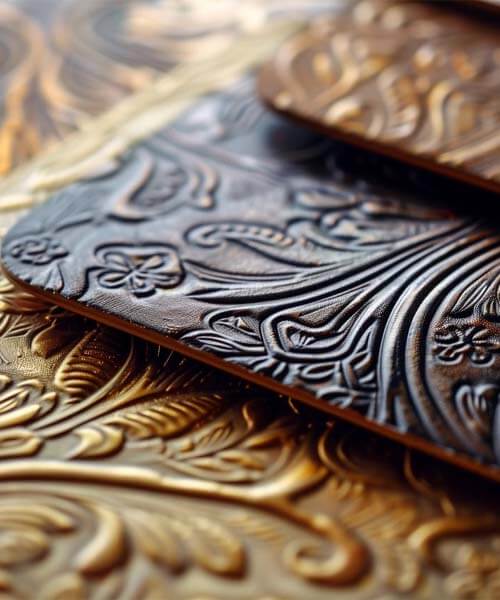
Embossing is when you raise the surface of something, creating a three dimensional effect. The process involves pushing an embossed design up from the material using two metal plates- one metal plate is on the top and the other metal plate is on the bottom.


This technique is ideal for thicker materials, like paper and heavier paper stock, and is often used on wedding invitations and high quality marketing materials. With embossing techniques, the embossed design can be barely raised or very raised -- a very raised design is visually appealing and can be achieved via deep embossing. 


A more complex emboss is, of course, often times more expensive to create than a more simple design. If you'd like a combination emboss, multi level embossing, or a repetitive element or recurring pattern embossed throughout a pouch or bag, you can expect to pay a little more than if only one small portion of your card is embossed. 

What is the embossing process
What is debossing process

What is debossing?

Unlike embossing, debossing techniques push metal plates into the shape of your design. As such, the design is recessed into the package itself, creating a depressed effect. If you've ever held a luxury bag with the name of the brand imprinted into the bag, this is the depressed effect creating via debossing. 


In either scenario, you can choose to leave the debossed area untouched, or it can be "filled in" via ink or foil stamping. One of the key benefits of debossing, especially when compared to embossing, is that the debossing effect doesn't impact the back of the package you're printing. This means you can make the back of the product as visually appealing as the front -- whether that's adding really cool visuals, detailed designs, or some other type of visual embellishment to both the front and the back.


Ultimately, debossing creates more design flexibility, as you can use the same design on the front, the back, or on both sides.

Choosing between the embossing and debossing process 

Embossing and debossing both have their own advantages, and which you choose ultimately depends on your personal preference and on what you're hoping to achieve with your packaging.


For example, if you'd like to accentuate raised patterns on your business card or card stock, embossing sounds like it's the right choice for you. However, if you'd like to make a lasting impression by customizing both the front and the back of your luxury packaging, it sounds like debossing is what you're looking for. 
Choosing between the embossing and debossing process

Considerations for embossing and debossing

When choosing between embossing and debossing to enhance your brand recognition, there are a few things to consider:

Keep it simple

When in doubt, opt for a design that errs on the side of caution. In this case, the more simple the design, the better. Embossing and debossing help drive attention to a single section of your package -- if the entire thing incorporates debossed or embossed designs, it defeats the purpose. 


Keep it simple embossing-vs-debossing
Use heavier paper stock

Use heavier paper stock

The most effective use of embossing and debossing is on heavier paper. Using heavier paper stock for your imprinted or raised design highlights the depth and detail of the finished printed pieces. 

Consider the back of your package

Since registered embossing will affect the back of your business card or packaging (i.e., the embossed image will peek through the back), you'll want to avoid embossing if you're hoping to have both the front and back of your package customized.

Both embossing and debossing create finished print pieces that stand out where others fall flat. Although various materials can be used for these techniques, a small pattern or images emboss better into a thicker card stock or paper, like those typically used for a business card. Though we use offset printing and our printer creates beautiful imagery on other materials, the thicker the material, the better. 

Consider the back of your package

Embossing vs debossing FAQs

Can embossing and debossing be combined into a single design?

Yes! Debossing, embossing, or any combination of the two can be incorporated into your final print pieces. If you're hoping to save money, though, we recommend choosing one or the other. Since each process uses different settings of die presses, including both techniques into one package can quickly increase the price of your design. 

Is embossing and debossing suitable for all types of printing?

No -- ideally, embossing and debossing are reserved for paper and cardstock, and ideally the thicker the material the better. This printing technique should be avoided on thinner materials. 

How does embossing and debossing affect printing costs?

Of the two, debossing is the cheaper option because it only requires one plate rather than two. If you want your final print piece to have both embossed and debossed designs, this will be even more expensive than just opting for one. Additionally, if you choose to incorporate foil stamping into your final print piece, this will also impact the price. 

CarePac: Your partner in custom printed flexible barrier pouches 

Curious about how embossing, debossing, and foil stamping can help take your design to the next level? With nearly two decades of experience in packaging industry, CarePac can help take your custom printed flexible barrier pouches to the next level. Contact us today to get started!

Lets Get Started

Made In
The USA

Full Pouch
Customization

Scalable Printing
Digital & Plate

Read More
print-ready-file-featured
Art File Setup

What is a Print Ready File? – Guide to Press Ready Artwork

Carepac Logo black What is a Print Ready File? - Guide to Press Ready Artwork
$0.00
Cart

No products in the cart.

round account button with user insidegrey What is a Print Ready File? - Guide to Press Ready Artwork
Carepac Logo white What is a Print Ready File? - Guide to Press Ready Artwork

What is a Print Ready File?
A Guide to Press Ready Artwork

ART SETUP COVER What is a Print Ready File? - Guide to Press Ready Artwork

Click to play

What is press ready artwork?

Print Ready (also called press ready) describes any file that is able to meet the specifications required to be setup for final press work and printing. 

Download a demo setup file

Click here to download our demo file which illustrates the best practices we outline here. 

What is press ready artwork

CarePac's Art Setup Checklist for Designers

If you're preparing artwork for CarePac, either digital printing, flexographic, or rotogravure printing, here is a quick recap of the important points to hit if you want to create print ready artwork:

  • Outline text: Convert all text to outlines.

  • Use Vector art: Create all non-photographic text, graphics, and illustrations using vector graphics.

  • Raster images: Should be at least 300DPI (dots per inch). Link or embed these in the file.

  • PMS Colors: PMS color are solid pigment colors not a colour mix like CMYK. Refer to Solid Pigment Uncoated Swatch book. PMS colors used with digital printing will not be 100% accurate to the swatch.

  • Finishes and Effects: Apply a unique off-pallet color to distinguish these areas in the design. Avoid relying on transparency in your design. Also it is best practice to separate designate clear areas in additional panels, see our finish mapping section below.

  • Bleed: Bleed is not required.

  • Plate Printing: 10 color stations are available, but we recommend limiting to 8 colours. White ink counts as a color.

  • Preferred format: Original Adobe Illustrator (AI) or PDF/X-1a.

  • Canva: For Canva artwork, export both PDF and SVG versions. If possible, share edit access to the Canva project.

  • Artwork placement: Place all artwork on the same layer as indicated in your dieline. Do not edit the dieline, add color swatches to the color bar, and remove unused color swatches. Avoid placing critical graphics in zipper areas, seal zones, or around hang holes.

Indicating Finishes, Windows, and Metalized Effects

Indicating Finishes, Windows, and Metalized Effects

We recommend using a "finish map" which separates these indications from the printed image and the rest of your graphic design. See below for our specific finish mapping recommendations:

  • Clear areas: Use an obvious color that contrasts with the design to indicate any clear unprinted area.
  • Finish indication: Use a finish map to indicate type and location of bag's finish.
  • Metalized effects: Indicate areas of metalized effects using a separate metalized map. Choose a color for the metalized area. Do not use a gradient color, use a solid color like grey.

Note: Use a distinct color to indicate windows in your design. 

File Types and Formats

The industry standard, correct file type for flexible printing is Adobe Illustrator. Unlike some printers who may be more selective about the file formats, like most printers CarePac supports Photoshop (.ps), Illustrator (.ai), Adobe InDesign (In), and Acrobat (pdf) but CarePac's design team can also work with Encapsulated PostScript (.eps), Solid Vector Graphics (.svg), or Canva files. Finally, if all you have is a PNG, JPG or ok print images, we have worked with it all and will work with you.

When in doubt, ask. Knowing the correct file format before starting the design can help you avoid time consuming revisions down the line. For example, CarePac's preferred format is an original Adobe Illustrator file or PDF/X-1a, or PDF and SVG for Canva, but another company may prefer something different. "Print ready" varies slightly from printer to printer, so you'll always want to check.

File Types and Formats

Artwork preparation (size, resolution, bleed area)

Now that you know you're using the appropriate file type, you'll want to make sure the artwork you're submitting is the correct size and resolution. All logos should be within the Safe Design Area (typically 1/8" inside the die line), and that the resolution of the image if it is a raster is at least 300dpi at 100%. Between 300-450dpi is the sweet spot -- anything too large or too small will print poorly on the final printed file. Trust us, if at all possible provide a vector copy of important elements like a logo, to avoid seeing individual pixels on the final image, so just follow the above steps!

CarePac does not require that you bleed the file you submit to CarePac. But if you are going to add a bleed to your own artwork, we recommend adding a 3mm - 5mm (.125" - .25" ).

CarePac's dieline design checklist

When designing a dieline, you'll want to follow this dieline checklist to make sure you've covered the basics. As always, our helpful team of designers is here to provide their expertise and help guide you through the process.

Type Setting


  • Text Formatting: Outline all text.
  • Minimum Font Size: Suggested minimum is around 6 pt. Absolute minimums are 3 pt bold for positive text and 5 pt for reversed text (knockout).
  • Typesetting Caution: Avoid using Photoshop for typesetting or Smart Objects.
Type Setting
Plate Printing Specifics for packaging

Plate Printing Specifics


  • Max Colors: Keep under 8 colors (including white ink). Up to 10 colors can be accommodated with additional charges.
  • Line Screen: 177 line screen based on 300 DPI imagery.
  • Under 15% Screen: Eliminate from CMYK mix or convert to 100% spot.
  • PMS Colors: Reference PMS Swatch books. Be aware of differences between on-screen colors and printed or film colors.

Barcodes and QR Codes Specifications


  • Ideal Size: Between 80% and 120%. Avoid truncating the barcode.
  • Format: Barcodes should be in Vector line art.
  • Ink for Barcodes: Use Pantone Black, or 100% Black.
  • QR Codes: Recommended size is 20mmx20mm. Ensure high contrast (white/black).
Barcodes and QR Codes Specifications for printing
Vector vs. raster images in priting

Vector vs. raster images

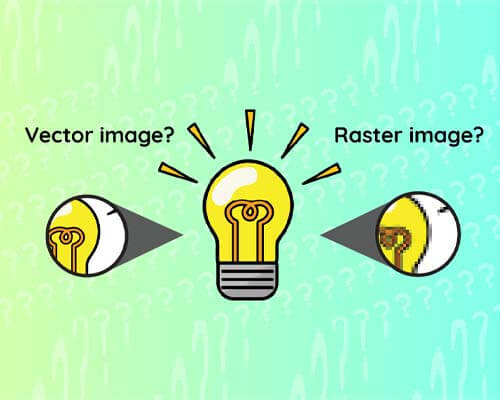
So, what's better: raster images or vector graphics? In our opinion, vector graphics are preferred since this type of artwork can be scaled to any finished size without sacrificing image quality. Vector images don't pixelate and it's native to software like Adobe Illustrator, but it does have its limitations. For example, all photographs will be a rasterized image. Our tip is to reserve raster images just for photographs, and build all logos and other graphics in vector format.

Use the correct colors

To ensure you're creating print ready artwork for graphic designers, you'll need to set your file format to CMYK color mode. If using Pantones or spot ink colors, apply them and make swatches. This way, in color separations, if you preview the colors they'll be assigned correctly. Since all printer files use CMYK color space, your colors will change noticeably if they're submitted in RGB. Since RGB and CMYK are two different color builds that don't correspond to each other, it is absolutely essential that your print ready artwork is submitted using CMYK color model.

It is also important to note that the color modes you see on your screen will be different than the color in "real life". Do not be alarmed- this kind of minor variance is totally normal.

Use the correct colours in printing
Sending your print ready artwork in printing

Sending your print ready artwork

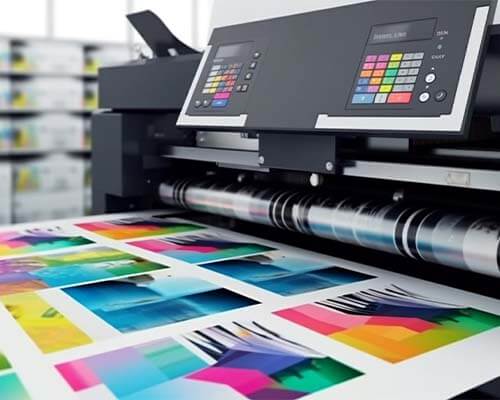
There are a few different ways you can send us your print ready marketing materials so we can take your print ready art and turn it into a finished printed product via our proprietary printing process.

  • Package your artwork and send the entire project in one packaged file

  • Send any raster image originals that are separate from your artwork.

  • Convert your text to outlines

We recommend attaching your digital art to the email or uploading the vector file using your printing partner's preferred system, as embedding them within the email will cause your high resolution image to degrade. Remember to send the appropriate file formats, whether that's a vector file or raster image.

Print ready artwork: FAQs

Here are some common questions we get from potential customers about artwork types and their print readiness:

What does print ready artwork mean?

Print ready artwork is a file that's ready to be printed as is. It helps maintain print quality, and should take things like pixel density, bleed area, and the design and print quality listed above in mind.

What are some accepted file types?

CarePac prefers to accept files that are high resolution Illustrator art files (AI, we can also accept Corel Draw and some Canva output but Canva often exports Raster image graphics instead of vectors. Many different file types are accepted by different printers, so it's important to check with your printer.

What if my graphics aren't print ready?

If your graphics aren't print ready or are at an unacceptable quality level, our CareDesign team can work with your graphic designer to get your submission in tip top shape shape for printing. While we prefer to only accept art that match our criteria our team of talented pre-press designers are able to fix a lot, we mean A LOT of problematic art, and have developed processes around most any problem you can imagine. So if you just can't get your new project over the finish line, submit it anyways, we're here to help, that's why we're called CarePac!

What are the requirements for print ready art files?

The criteria for print ready art files are laid out in this post, there maybe adjustments depending on some technical print parameters but following these guidelines will help ensure that the artwork designed by your team can be turned into the perfect print. Some things to keep in mind include using CYMK, using vector paths for anything other than photographs, and avoid placing critical graphics along seams or seals.

I need to make a change to the file's dieline, can I edit it?

No, please don't! Never edit dielines provided to you, if you need a dieline adjustment contact our CareDesign team!

Should I add Crop marks or other indicators of off-canvas cuts, or prints.

While we receive artwork with off canvas information daily, there is no need to include this content in your submission.

Are there any special setup instructions for box bottom bags?

Box Bottom bag setup is generally the same as any other pouch. One key difference to keep in mind is that box bottom bags require two separate print runs – one for the Front, Back, and Bottom, and another for the sides.

Note that alignment between side panel print and front/back may not be 100%.

What are the Line screen specifications by color?


  • C: 177
  • M: 177
  • Y: 177
  • K: 254
  • Spot Color: 254
  • Under 15% Screen: Eliminate from CMYK mix or convert to 100% PMS Spot.

What is the recommended trap size?

Typically the CareDesign team will perform all trapping but a good rule of thumb is 0.3mm. If you want to attempt trapping please see this helpful article and video on our site.

What is the recommended trap size?

Well you smarty pants, yes there is!
  • Dot: Diamond

  • Min Dot %: 5%

Get started with CarePac today

Our eagled eyed production team is ready to turn your printable file into the final product you've always dreamed of. With a high quality finish, the appropriate colour mix and pixel density, and state-of-the-art printing plates, our graphic design team promises to create the best print using industry standard practices. Plus, we'll do so using your desired print materials. With our handy checklist, preparing artwork and high resolution images for printing has never been easier. You have multiple jobs: leave the designing and printing to us! Contact us today to get started!

Lets Get Started

Made In
The USA

Full Pouch
Customization

Scalable Printing
Digital & Plate

Read More
Dieline-Tips-and-checkllist
Packaging Design

Dieline Design Tips & Checklist

Carepac Logo black Dieline Design Tips & Checklist
$0.00
Cart

No products in the cart.

round account button with user insidegrey Dieline Design Tips & Checklist
Carepac Logo white Dieline Design Tips & Checklist

Dieline Design Tips & Checklist

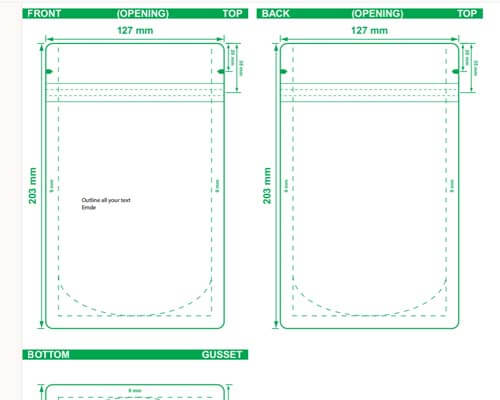
Crafting your packaging design around a dieline template allows you to be as creative as you'd like with your packaging while still falling within the specific sizing dimensions of the final packaging product. A dieline clearly outlines all the folding marks, cuts, perforations, and glue lines/fold line of the final packaging design, so there's no surprises when you receive the final product. Think of it like a coloring book: you can incorporate as many colors or designs into the picture as long as you stay within the bold outlines of the book.

At CarePac, we provide design templates and dielines for our customers, but it's not uncommon for them to create our use their own. Regardless of whether you use our dieline or a custom dieline you've created yourself, here are some dieline design tips to help you get started.

Tips for document setup

As discussed on our print ready artwork page, all packaging files should be in CMYK color mode. Our preferred format is Adobe Illustrator (AI) or PDF/X-1a, but other packaging companies may have different preferences. You'll always want to check. You'll also need to make sure the orientation of your dieline is facing the correct way - otherwise the text and images of the final design will be facing the wrong way.

Tips for document setup
Consider the material

Consider the material

Before using a dieline template, you'll need to nail down the packaging material. Some materials (like cardboard) are very thick and rigid, which has an impact on how it folds and where it can be cut or perforated. While cardboard is quite rigid, plastic will conform to the contents inside. On the other hand, if you overfill the plastic pouch it could be hard to seal. Work with your packaging provider to decide on a material and discuss how the selected materials will impact your dieline design.

Factor in size and weight

Depending on what you're packaging, your packaging should not only fit around your product but protect it from damage during transit and storage. For example, nobody wants to open up a bag of chips only to find that they're all shattered into a million pieces. Consider the size, shape, and fragility of your product when using a dieline template to design your finished product.

Factor in size and weight in packaging
Leave space for branding and text in packaging

Leave space for branding and text

This is the important part: without incorporating company branding or additional text on your dieline, your customer won't know what sets your product apart from all the others on the shelf. Make sure there is enough space on the package to include artwork, information about your business and its values, or allergen information for food products. This is the whole point of a dieline: to show you where you can add text and how it'll look on the final product.

Test and prototype

Before you finalize your dieline design and order 10,000 bags or boxes, you'll want to order prototypes of the bag. This helps you see the bag's functionality, exact size, the logos and graphics, and any labels in person before committing to a large order. This way, if you notice any mistakes with the packaging design you can rectify it before you waste too much money on the packaging. CarePac offers custom prototyping from 100 bags, which is a major differentiating factor from some of our competitors with minimums that exceed 1,000-10,000 bags.

Test and Prototyping in packaging

CarePac's dieline design checklist

When designing a dieline, you'll want to follow this dieline checklist to make sure you've covered the basics. As always, our helpful team of designers is here to provide their expertise and help guide you through the process.

[ ] Software and file setup

Start your dieline with a brand new vector file in Adobe Illustrator. Your document should be set to the appropriate size and resolution (typically 300 DPI.) Each packaging provider will have different requirements for dieline design, so make sure to check with them directly before submitting a dieline. One thing all companies have in common, though, is using CMYK document color mode.

Software and file setup in packaging
Material consideration in packaging

[ ] Material consideration

Choose your packaging material wisely. Different materials will impact your dieline design in different ways, so work with your design team and make allowances for the thickness of the desired material in your fold and cut lines. You'll want to make sure that the material you choose (and the design) accounts for the product's protection during storage and transport.

[ ] Product dimensions and weight

Make sure you take the time to measure your product accurately. The packaging design template should accommodate the weight, size, and shape of your product. Not only should you have enough room for your product, but you shouldn't make the top of your bag too crowded. If your package is overstuffed it simply won't function as well as a bag with a little room to spare.

Product dimensions and weight in packaging
Branding and information in packaging

[ ] Branding and information

Yes, your packaging templates should leave room for fold and cut lines, but it should also leave room for branding elements, like labels, custom graphics, your own artwork, images, or a little window that lets customer see the product inside. Consider the best placement for visibility and functionality.

[ ] Prototyping

Creating a physical prototype of your packaging design that you can hold in your hands is essential. It's the only way you can sure that you have the correct layout and that your packaging designer has included everything you need into the design.

Prototyping in packaging
Finalize artwork and design of packaging

[ ] Finalize artwork and design

Once you have a physical prototype in your hands and have confirmed that it follows the proper layout, you'll want to finalize the artwork and design. Add a label, account number, or any other custom feature you need. Check your specifications and submit the packaging templates into production. Your job is done!

Free Dieline Generator

Dielines define the physical size of your pouches. Fill out this form and you'll receive the free dieline by email. 

Dieline design FAQs

Here are a few comment questions we receive about dieline design:

How do I know my product will fit in the bag?

The best way to make sure your product fits in the bag is to pay for our awesome prototyping service. With as few as 100 bags, it's a cost efficient way to make sure your product will fit comfortably.

Will retailers accept my size and configuration?

In order to ensure your packaging will be accepted by the retailer, you'll need to check with them directly. You may need a hang hole, and they're the only ones who can confirm if the bag size is correct for distribution.

Does it need to stand up?

Although flat packaging is often the standard, you'll need to decide internally if your dieline should incorporate the need to stand up into it.

Do I have to create my own dieline?

No! CarePac provides design templates, which can be customized to your liking. Because all our packaging is made to order, you have control over the dieline structure and layout.

CarePac: Your partner in dielines and packaging

As you can see, creating packaging isn't always easy. Whether you're packaging food, clothing, coffee, or snacks, our designers can help you incorporate all the necessary elements onto your bag. From images to folded lines, dielines act as a blueprint to your final design and should be taken seriously. Whether you use your own graphic design software or leverage our design team, dielines are the best way to refine packaging so the final product is exactly what you're looking for.

Lets Get Started

Made In
The USA

Full Pouch
Customization

Scalable Printing
Digital & Plate

Read More
barrier-packaging-guide-featured
Flexible Barrier Packaging

Barrier Packaging Guide

Carepac Logo black Barrier Packaging Guide
$0.00
Cart

No products in the cart.

round account button with user insidegrey Barrier Packaging Guide
Carepac Logo white Barrier Packaging Guide

Barrier Packaging Guide

Choosing the right packaging materials for your product can be a daunting task. Not only does the packaging need to look great, but it needs to protect the perishable products within, working to extend shelf life and extend freshness. Additionally, you'll need to take a variety of things into account: how long will the product be in storage? Will it be stored in a climate controlled environment, or outside in a hot and stuffy warehouse? Does the packaging require more than one layer of protection, or just one?

Fortunately, you're not alone in your hunt for the perfect barrier packaging material. Our barrier packaging guide will walk you through some of the most common questions we receive about barrier packaging, the advantages of an oxygen barrier, and more. Welcome to our guide to barrier packaging, created by the people who know barrier packaging best.

What is barrier packaging?

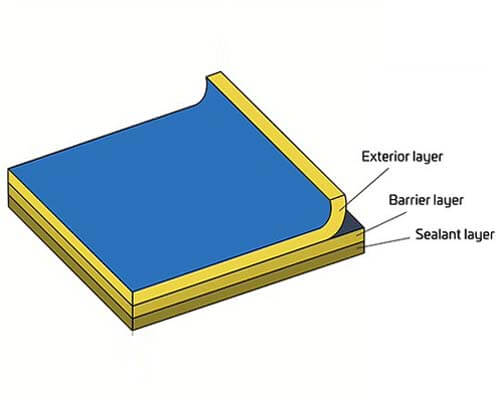
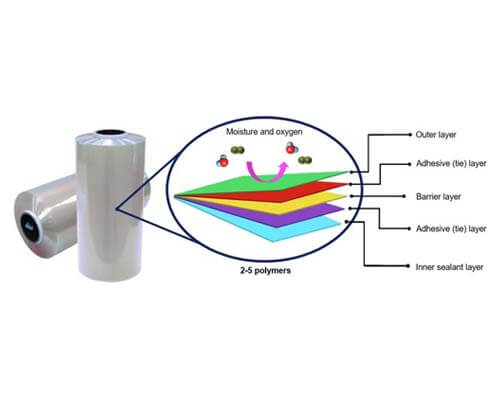
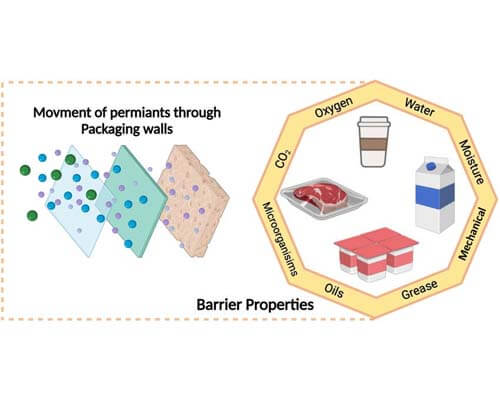
First things first: what is barrier packaging? Barrier packaging is any packaging that prevents the migration of moisture, gas, or oxygen through the packaging, creating what some refer to as a modified atmosphere package. This barrier can be thought of as a firewall, preventing the movement of gas or liquid. In short, barrier packaging is made from a packaging material that provides a high barrier between the product inside and oxygen, moisture, light, and gas. In some cases, barrier packaging can also act as an aroma barrier, keeping products fresh and odors and scents inside the plastic bags.

What is barrier packaging

How is barrier measured in packaging?

The two main measurements of barrier are moisture vapor transmission rate (MVTR) and oxygen transmission rate (OTR). There are other measurements, but for food products these are the most common measurements. Learn more about what exactly these measure in regards to barrier packaging materials.

Moisture vapor transmission rate

This is measured using standardized testing protocols from ASTM or ISO. Grams per square meter over 24 hours (g/m²/day) is a common measurement, and it measures how many grams of moisture are transmitted through the packaging material in a 24 hour period. In the United States, some companies use grams per 100 square square inches over 24 hours (g/100 in²/24 hr) which measures the amount of moisture passing through 100 square inches of material in 24 hours.

Moisture vapor transmission rate
Oxygen transmission rate

Oxygen transmission rate

Typically measured in CC/100in square in 24 hours (cc/m²/day), this measures the amount of oxygen that passes through the material over a specific area across 24 hours. In the United States, some companies use CC/100 in²/day, which measures square inches per 24 hours.

Understanding these common measurements for barrier packaging materials can be confusing, which is why it's so important to work with a professional and experienced packaging company, like CarePac. We'll walk you through the various oxygen and moisture barrier properties, ensuring that the packaging material you choose has the barrier properties you need.

What are the different levels of barrier protection in packaging?

When it comes to understanding the different barrier levels of plastic films, they're typically divided into four categories: basic single, basic double, moderate, and high performing. Each level offers a stronger oxygen and moisture barrier and the barrier strength increases with each step up. Here's a little more information about the barriers and the metallized films that fall within each category.

Basic Barrier- Single Layer

This offers your most basic level of moisture and oxygen barrier. It temporarily protects the product within from exposure to light, oxygen, and moisture, but won't do much to extend the shelf life of the product. Think of this as your most basic low barrier material, such as the monolayer materials that make up a sandwich bag. If you're on the hunt for a high barrier material, keep looking!

Basic barrier- single layer
Basic barrier- multilayer materials

Basic barrier- Multilayer Materials

Basic barriers that use multilayer materials are still relatively "basic" in nature, but they do offer enhanced protection when compared to a basic barrier with a single layer. Often associated with laminated packaging, you'll often see a combination of materials in a double layer barrier. For example, PET/PE combines polyethylene terephthalate and polyethylene, OPP/PE combines oriented polypropylene and polyethylene and OPP/OPP has two layers of oriented polypropylene.

Polyethylene Terephthalate (PET) provides a good barrier against gas, moisture, and aromas, and is often used in multilayer basic barriers.

Moderate Barrier

A moderate barrier will often protect against gas, moisture, aroma, and sometimes UV light. These coated films are lightweight and food safe, and are often used for food packaging. CarePac's PET/VMPET/PE is considered a moderate barrier material, and the metallization of these films offers an enhanced oxygen barrier. Unlike the basic barriers, a moderate barrier can help extend the shelf life of food, pet treats, and other items.

Moderate barrier packaging
High performing barrier

High performing barrier

Finally, high performing barriers are made up of multiple layers of heavy duty materials. Our high performing barriers protect against odor, moisture, gas, UV light, and visible light, and will keep the product inside fresh. If you're concerned about your product being exposed to gases, chemicals, and other detrimental elements in the environment, choosing a high performing barrier is essential. CarePac's PET/AL/PE bags use aluminum foil as the middle layer, which has incredible barrier properties, and is nylon reinforced for super protection and durability.

Which barrier should you choose?

So, which level of barrier protection is right for you? While a higher barrier is always better, especially for food products, excessive barrier is just a waste of money. Selecting which level of barrier you need also depends on a variety of unique factors, such as whether or not you need a window to view the product inside. For example, if you don't need a window, choose a metalized material with a better barrier.

We know this can be incredibly confusing, which is why it's so important to work with an experienced and qualified packaging company that's well versed in flexible packaging and barrier properties. Curious about the advantages of one barrier level over the other? Need help with the development of your packaging? We can help! Contact us today!

Lets Get Started

Made In
The USA

Full Pouch
Customization

Scalable Printing
Digital & Plate

Read More
how to get product in stores
Other Packaging Topics

A Guide on How to Get Your Product in Stores

Carepac Logo black A Guide on How to Get Your Product in Stores
$0.00
Cart

No products in the cart.

round account button with user insidegrey A Guide on How to Get Your Product in Stores
Carepac Logo white A Guide on How to Get Your Product in Stores

A Guide on How to Get
Your Product in Stores

Whether you're a brand new business trying to get your product in stores or are an existing business that's toying with the idea of expanding your existing product line, getting your product into retail stores like Target, Wal-Mart, or another big box retailer is often times a "make it or break it" situation. If this kind of business sounds like you, here are a few tips on how to get your product in stores, from smaller stores and local retailers with only a handful of storefronts to major retailers with stores nationwide. Wondering how to get your product in stores? Read on for our helpful business tips!

Identify the right store

Before you approach retail stores, do market research and understand where your potential customers and target market shop. Most entrepreneurs automatically assume that getting their product onto the shelves of large chains is the best way for them to sell products, but for many businesses it's just as important to establish relationships with small business owners in your own town.

If you haven't already researched your customer base, business clients, and target market, do so immediately. This will help you understand more about your potential buyers, the price points they look for in stores, and whether they shop online or in person.

Start small and gradually

Start small and gradually expand to more retail stores

If you're a small business owner yourself, the best advice we can give is to start small: consider a hybrid approach where you sell products or t shirts on online marketplaces, virtual trade shows, AND local stores. Establish a customer base, work on building relationships with your online customers and vendors, and then consider expanding to a national chain with a multitude of stores. Once you've identified the right retail store, it's time to move onto the next step.

Pitch your product to the retail store

So, you've identified the right retailers and local stores. Now it's time to pitch your product to the online or big-box retailers. In some cases you'll be pitching your product to the store owner in person and in other instances you'll be meeting with retail store owners virtually. In both scenarios, you'll be meeting with key decision makers, so this is your opportunity to create hype around your brand and business.

Partner with a marketing business

If you've never pitched a product to retailers or local stores before, you may want to partner with a marketing business that's well versed in putting together marketing emails, can calculate projected sales numbers in your target market, can project demand among your buyers, and understands what a decision maker looks for during the product pitch for their store. This is one area where you do not want to be unprepared. Sales matter, so consider hiring a sales person who understands your market.

Partner with a marketing business

Understand the requirements for products & product packaging

What are the requirements larger retailers have for their new products? What are absolute must-haves for packaging? Here are a few things your small business should keep in mind, especially if you'll be meeting with larger retailers in an effort to get your product in stores.

Compliant packaging

Is your packaging compliant with local regulations? Buyers care! Things like PFAS and meeting FDA standards are all very important to small, medium, and big retailers. CarePac can help ensure that all your packaging is compliant, which is something overseas suppliers can't really provide.

Compliant packaging
Packaging size for local stores

Packaging size for local stores

Unlike other companies that make you fit THEIR packaging, CarePac can fully customize your the size of your packaging. This way, you're maximizing the space you do have on the store shelves. If you approach retail stores with packaging that's way too big for your product, this makes you look disorganized and unprepared.

Barcodes and QR codes

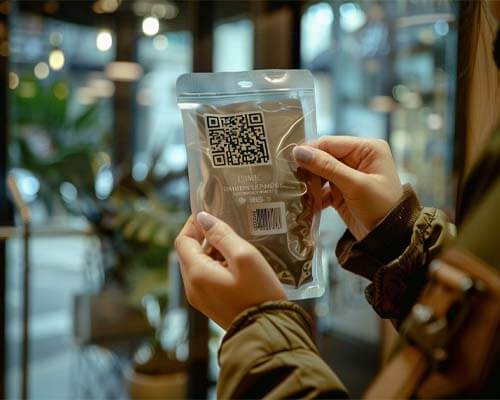
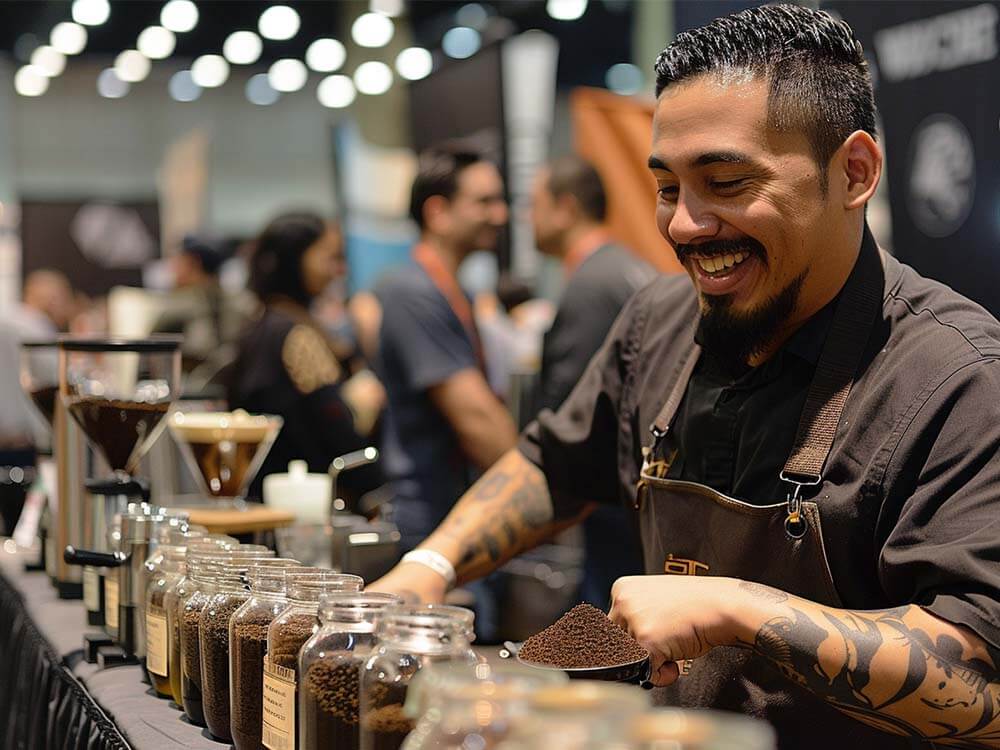
This is especially important if you're focusing on online sales, as many online retailers require bar codes with identifying information, such as pricing information. Whether it's an Amazon ASIN, a scannable QR code, or a standard barcode, make sure your product packaging has whatever information potential investors would be looking for.
Barcodes and QR codes.jpg

Come to the meeting prepared

This is one area of finding the right store where you don't want to fake it 'til you make it. Fortunately, CarePac can help you impress larger retailers and potential buyers with our prototyping. We're able to print as few as 100 bags, so you can go to the meeting with actual product samples in real product packaging. This can help get your product into stores because the big-box or local retailer will be able to hold your product in their hands, packaging and all.
Skip the mock-up; bring the real thing

Many small businesses go to these meetings with a mock-up or an "idea" of what their packaging will look like. Why not take it a step further and show the brand you're meeting with that you put a lot of thought into pleasing potential buyers with amazing packaging.

Skip-the-mock-up

Find a good co-packer

Finding a reputable co-packer means that they'll have the necessary equipment, production capabilities, and retailer staff to help you increase production when you need to. This way, if you see a huge boost in sales, either online sales or at retail stores, you won't have to worry about whether or not your co-packer can handle the increase in volume. Ask your co-packer about their ability to scale up, especially if you plan on adding new products or increase sales through an intense marketing campaign.

Find a good co-packer
Consider cashflow

Consider cashflow

Now comes the boring part: line sheets, ledgers, managing stock and inventory, and making sure your product can be replenished repeatedly without going into the red. Many retailers and stores pay you long after your customers and buyers purchase your product, and others are notorious for running on consignment- meaning you won't get paid until (or if!) you sell your product. Additionally, you might pay more for getting your product into stores that offer premium placement or endcaps.

This is the dark part of how to get your product onto store shelves that nobody talks about. Make sure you have a healthy savings account and are prepared for the product in stores to sit on the shelves a bit before you make any kind of profit.

Make sure your product stands out on store shelves

Now that you know how to get your product in stores, it's time to think about how to stand out from all the competitors who are selling similar things.

Ready to sell your product in stores, online, or at local shops? If the demand is there, we can help you take your business to the next level with the very best packaging. We can help you create packaging that's the real deal- it will help you stand out in your local area, nationwide, and everywhere in between. Regardless of what you're selling (or where -- online, in stores, it's all the same to us!), we can help package it.

Working with us is incredibly easy. We're a business, too, and we have experienced a lot of the same pain points as you. Your best bet for high-quality packaging that can help you lower costs and stand out at stores, is to work with us to create the perfect packaging.

Lets Get Started

Made In
The USA

Full Pouch
Customization

Scalable Printing
Digital & Plate

Read More